

Checking For Mites

You Cannot Manage What You Do Not Measure
Healthy colonies are monitored — not guessed at.
Regular accurate mite monitoring is the foundation of responsible beekeeping.
Why You Rarely See Mites
Seeing no mites on the backs of bees does not mean a colony is mite-free.
Mites spend most of their time hidden beneath adult bees or reproducing inside capped brood cells. By the time mites are easily visible crawling on bees, the infestation is often already advanced.
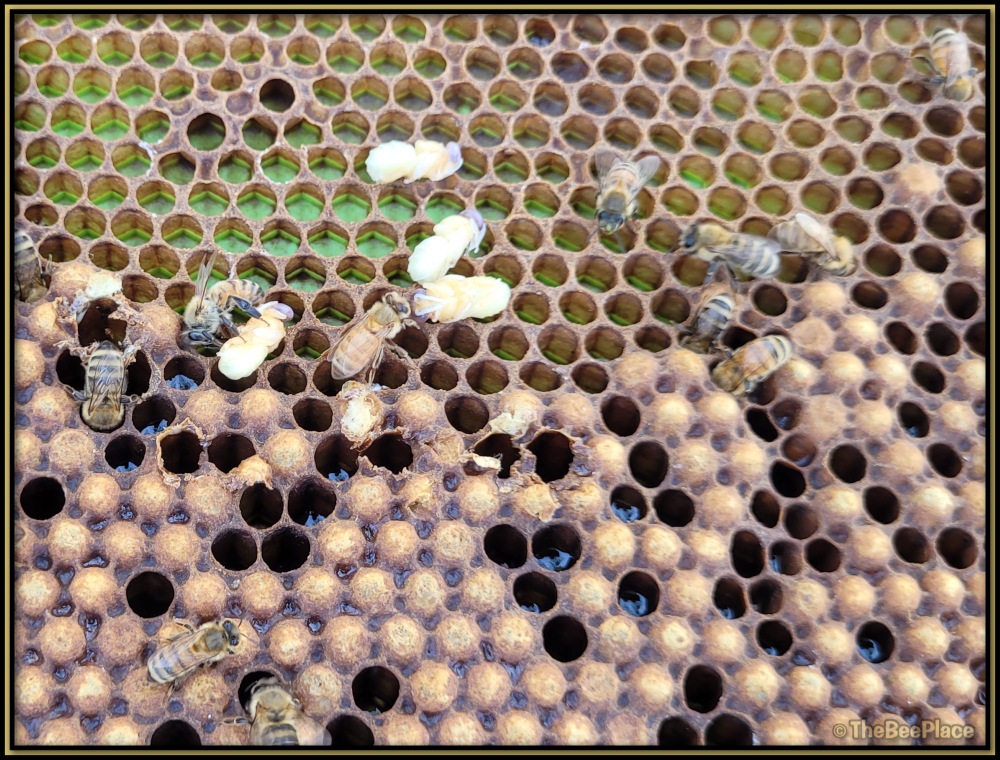
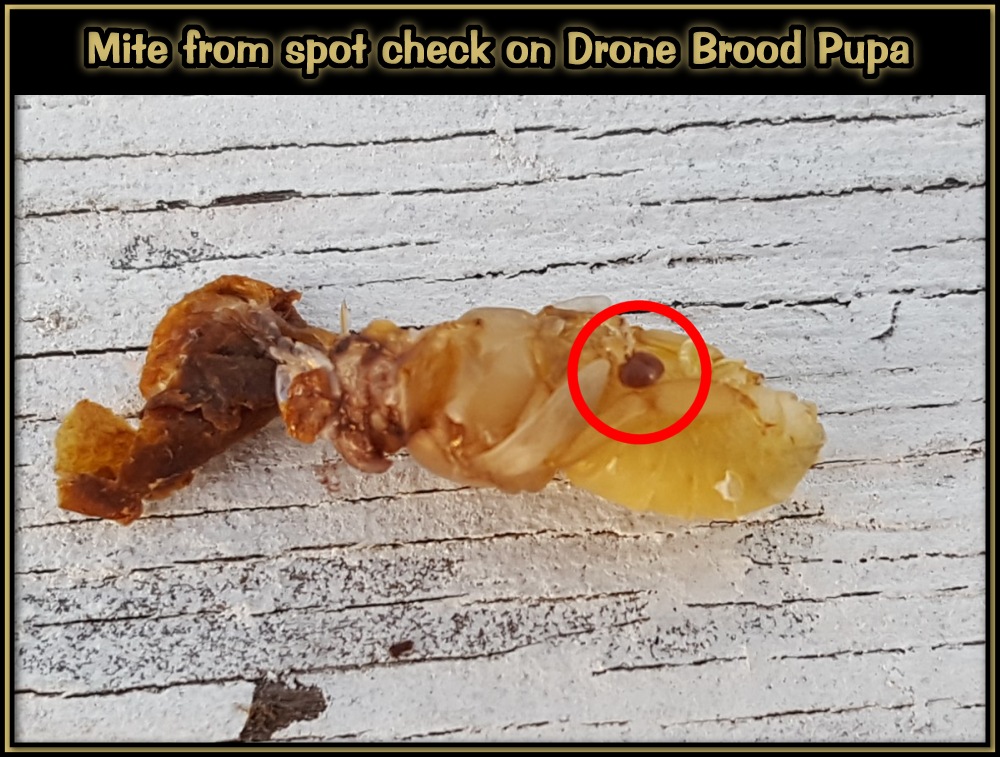
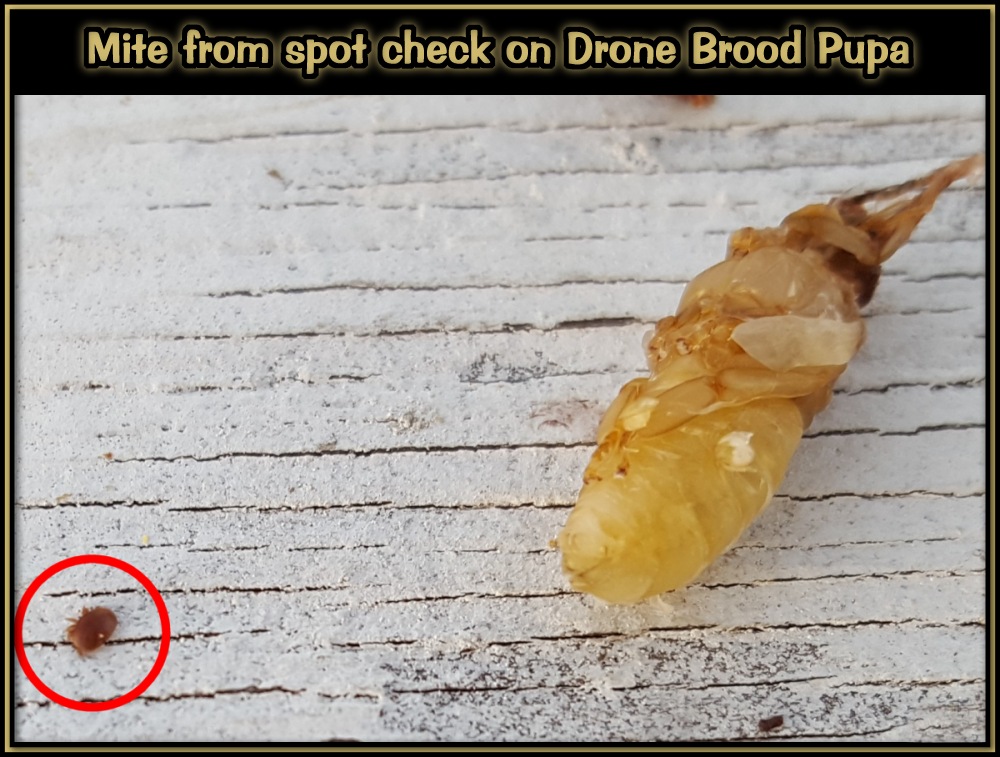
Visual inspection alone is unreliable, unless brood is removed from the cells - as shown in the image, removing drone pupae for a quick spot check.

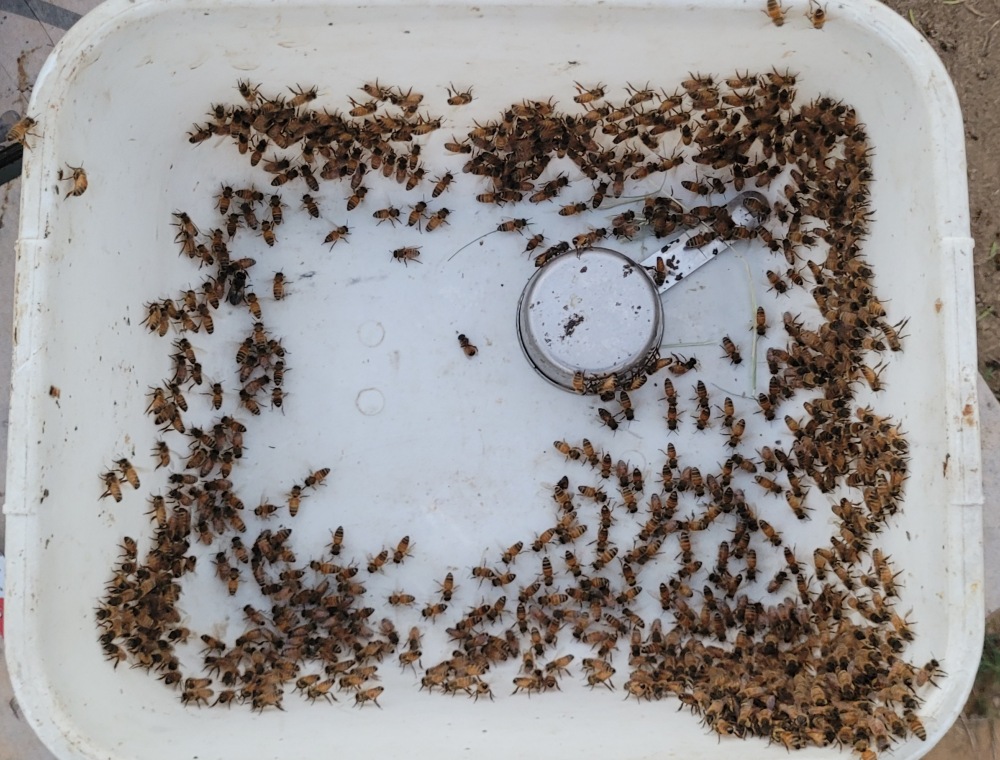
The Alcohol (or Soap) Wash Method
The alcohol or soapy water wash is widely considered the most accurate field method for estimating mite levels.
Approximately 300 nurse bees (1/2 cup) are collected from a brood frame, agitated in solution, and the dislodged mites are counted.
While this method sacrifices a small number of bees, it provides consistent and reliable data that can prevent the loss of tens of thousands.
See Demo Video below

Sampling the Right Bees Matters
Not all bees carry the same mite levels.
Foragers and bees from honey frames typically carry fewer mites. Samples should be taken from frames in the brood nest area where nurse bees are actively tending larvae.
The outer edges of the heart of the nest where the pollen is stored and made into brood food by the nurse bees is the area that provides good results. These nurse bees are the mites desired vehicles. They are used by mites to get a quick ride into the area of the nest where they need to locate the proper age larvae to move in with and begin their egg laying process.
This is where mites concentrate, making the sample meaningful.
What Is a Concerning Level?
Mite levels are commonly expressed as a percentage — mites per 100 bees.
Many researchers suggest intervention thresholds commonly fall between 2% and 4% infestation, depending on season and colony strength.
Higher levels are associated with reduced productivity, increased virus transmission, and greater risk of winter loss.
Testing provides the information needed to decide whether intervention is necessary.
How Often Should You Test?
Colonies should be checked regularly during brood-rearing seasons.
Testing before major nectar flows, after honey harvest, and in late summer or early fall provides critical information about colony health heading into winter.
Mite immigration from nearby colonies can cause sudden increases, so consistent monitoring is more reliable than fixed calendar assumptions.
Next Step
Once mite levels are known, treatment decisions can be made responsibly.
Understanding available treatment options — and how they differ — is the next step in effective Varroa management.
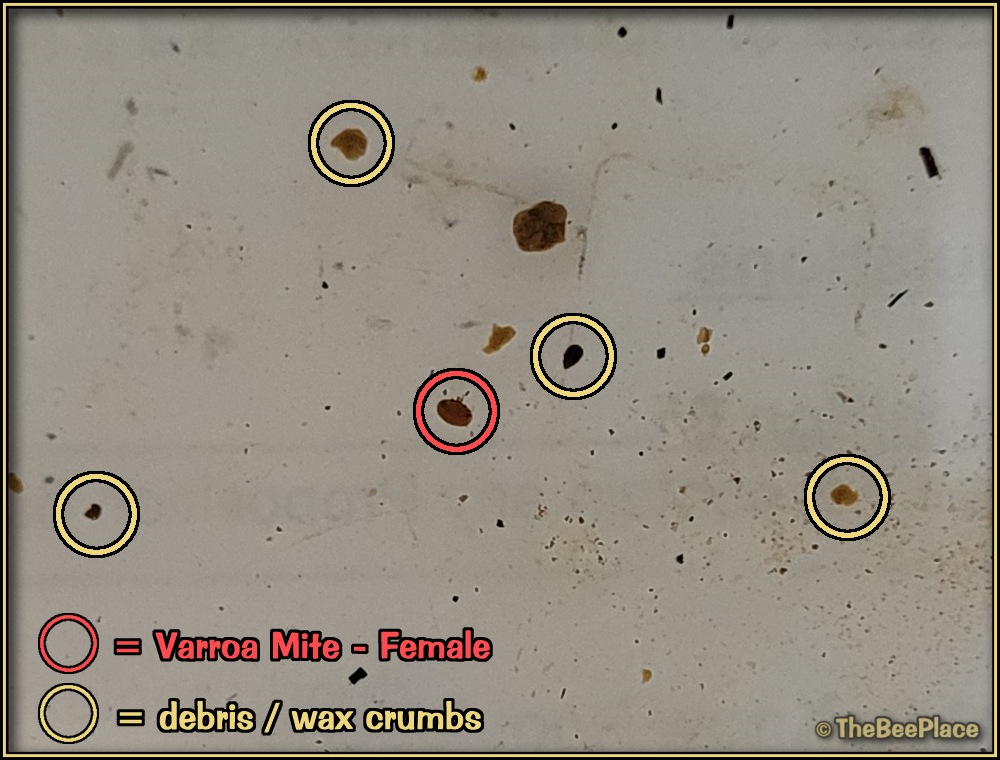
Interpreting Your Wash Results
After completing the wash, the mites will settle to the bottom of the container and become visible against the light background.
Varroa mites are small, smooth, oval-shaped, reddish-brown bodies. They have a distinct, rounded appearance and consistent shape.
Red circle = Varroa mite (female) — smooth oval shape
Yellow circle = debris / wax crumbs — irregular shapes
Wax crumbs and hive debris, on the other hand, tend to be irregular, jagged, or uneven in shape. They may vary in size and lack the uniform oval outline of a mite.
Taking a moment to distinguish smooth oval mites from irregular debris improves counting accuracy and confidence in your results.
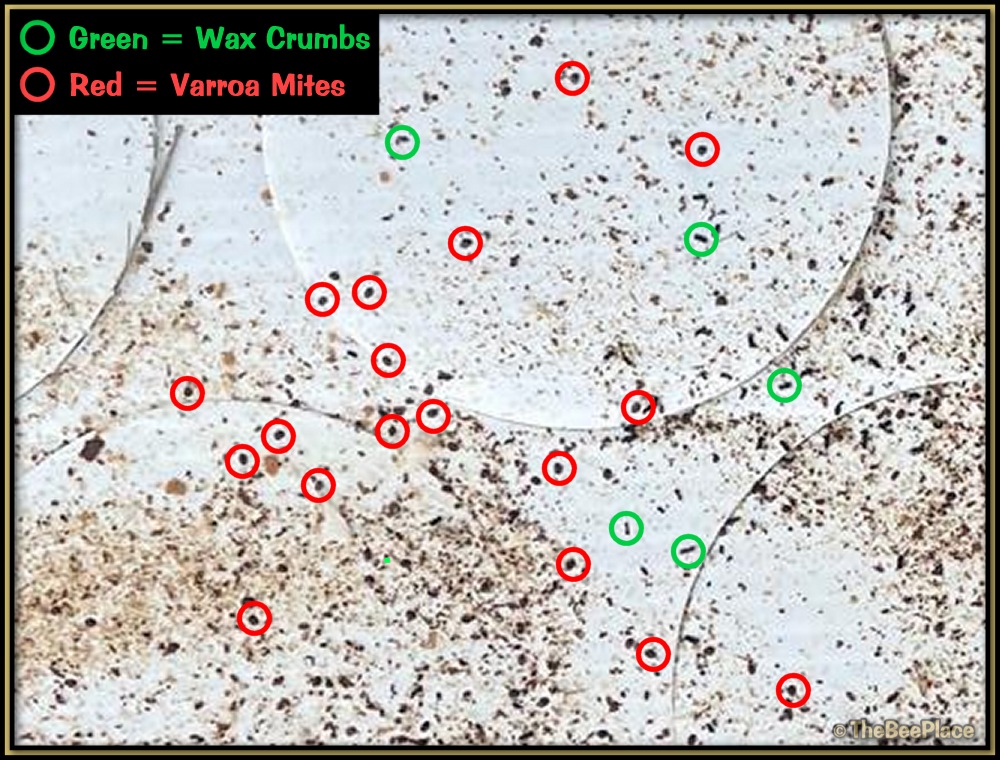
Using Sticky Boards to Monitor Mite Drop
Sticky or debris boards placed beneath the frames can help monitor natural mite drop or evaluate treatment effectiveness.
When a mite treatment is applied, placing a clean board under the hive for 24–72 hours allows you to see how many mites fall during that period. Checking again a few days later can help determine whether the treatment is continuing to work.
It is important to understand that sticky boards are best used as a monitoring tool — not as a primary method of estimating infestation levels.
When examining the board:
- Varroa mites appear as small, smooth, oval-shaped reddish-brown dots.
- Wax crumbs and debris are irregular in shape and uneven in texture.
- Other hive debris such as wax moth or beetle residue may also appear, but typically lacks the uniform oval shape of a mite.
Learning to distinguish between smooth oval mites and rough wax debris improves accuracy when interpreting board results.
Sticky boards help confirm treatment effectiveness — they do not replace alcohol or soap wash testing for determining infestation levels.
Green = Wax Crumbs and other debris - Irregular shapes
Red = Varroa Mites - Smooth edge oval shapes
